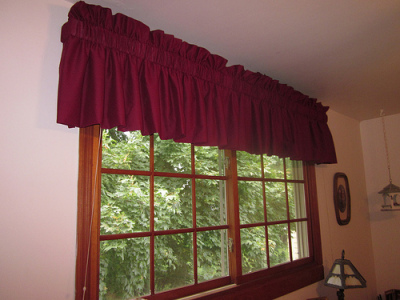
When I stayed at my mom’s the other week for a childhood friend’s wedding that was out in the suburbs, I wanted to surprise my mom by finally making the bedroom valence she had been wanting. We had picked out the fabric ages ago, and I just need to dedicate a couple of hours to sewing it up.
At this point, I’ve made three valences in her house already. You could say I’m working my way around the house. Because of the wedding festivities taking place throughout the weekend, I reserved Sunday morning, before heading back into the city, to whip this out. Sunday morning I got all set to make the valence. I had cut the fabric, started some initial ironing, pinned the first hem. I passed the first hem through the machine and went to pass the second and my machine stopped working. What?!?! Why are you not working, I yelled at it. It just stopped running, and didn’t start running even after 30 minutes. I thought maybe the motor overheated, which is why I waited, but the longer I waited, the more impatient I got to get home and do all of the other chores I would need to accomplish before the start of the week. So I went home.
A day or so later, I checked my sewing machine, and sure enough, it was working fine. So over the next few days I worked on getting the valence finished so I could get it hung before my mom returned from a weeklong vacation. Friday morning, I woke pretty early and actually finished. I packed it up and headed to my mom’s after work. It was hung with plenty of time and my mom was surprised, and appreciative.
Now, you want to make your own, right? Making a valence really isn’t that difficult. I figured it out, using a store-bought example, and it took no time.
You will need fabric three times the length of the window you want to frame. If you use one kind of fabric, just buy the right amount of yardage lengthwise and you’ll be set to go. You’ll want to sew a hem on the short ends. A variation of this is fold and iron a hem and leave it unsewn for a nicer edge on both sides. It really doesn’t matter which you choose to do, since most valences wrap around the sides and that edge often goes unnoticed, or unseen.
The width of a yard of fabric makes a nice length (from top to bottom) for most windows, so you typically don’t need to make a lot of cuts, although you can do so if you choose. Next you want to hem the fabric lengthwise; be sure to fold the right sides into one another when making this pass, so your side edge hems will be on the inside once you turn in right side out.
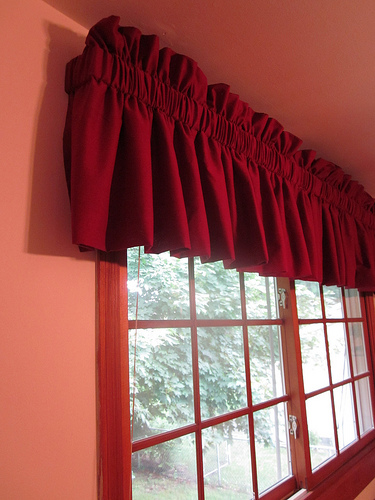
Once you’ve done that, you turn the piece inside out. This is a good time to do a final ironing of the piece to set the right creases, and make sure the fabric is smooth. Now you’ll need to mark up the fabric to sew room for the curtain rod to slip through. Measure the one you have, but a lot of them come in 1- or 3-inch widths. For my mom’s, the bar was 3 inches, so I created a very roomy 3 inches for the bar. I give the top of the valence (before the top of the bar) about 3 inches in this case. This makes marking the fabric pretty easy to make these passes because it’s about 3 and 6 inches. Mark the back of the fabric with a sewing pencil in a color that stands out enough for you to see it. I typically run the machine on the outside edges of my markings just to make sure that the fabric doesn’t pinch the bar. Once you’ve ironed and marked, pass the fabric through the sewing machine along the lines.
Two-Fabric Variation
Now let’s say you want to use two kinds of fabric—let’s say the facing fabric is really nice and a bit more costly, or it’s sheer and you need to back it with a solid fabric. In this case you’ll be making two panels if you were going to make a valence for a window like my mom’s. In this case, you buy one and a half the length of the window in each fabric. Then you cut the yard in half (widthwise, not lengthwise) and you make two panels facing one with the nicer fabric, and one with the liner fabric.
For the most part, you’ll be doing the same thing as the one-fabric method, sewing the ends and making the bar pocket. However, one thing I found when doing this method is that I didn’t want to see the seam of the fabrics meeting from below (where most people will view the valence from the vantage point of the floor). To get rid of this, I typically wrap the nicer fabric over the edge to the back a few inches so that you see a nice crease in that fabric from the bottom. Then I trim the excess from the backing fabric (basically the few inches that the nicer fabric took up in the back) so the top edges line up, making pinning easier. When you’re all said and done, you turn the valence inside out to iron a nice firm crease at the bottom. A passersby would never know that there’s a hem in the back, and you’ve created a really professional looking window treatment.
Now you’re ready to hang the valence and step back in awe of your amazing craftiness.


Share Your Thoughts